Facebook Error! Your pixel event was not associated with any domains. Ads without domains will be paused by Facebook unless you set up your domain in Events Manage
Print Created by: Roba FouadUnlike what some people might think, this is not actually an error; the reason why you’re seeing this message is the IOS and apple striving to protect customers' privacy; therefore, effective the 26th of April 2021 Facebook has enforced those new updates.
Now, if you ever come across this message do not be terrified, everybody is in the same boat!
All it takes is just 15 minutes with 2 simple steps and you’ll be ready to rock!
-
Verify Your Domain (5 minutes).
-
Configure Website Events Using Aggregate Event Measurements (10 minutes).
Step 1: Verify Your Domain
This step is to claim your domain under your Business Manager. After the setup, no other Business Manager should use your domain to advertise. If you engage an external party or advertising partner, you need to assign them under "Partner" in Business Settings.
For now, let's get your domain verified.
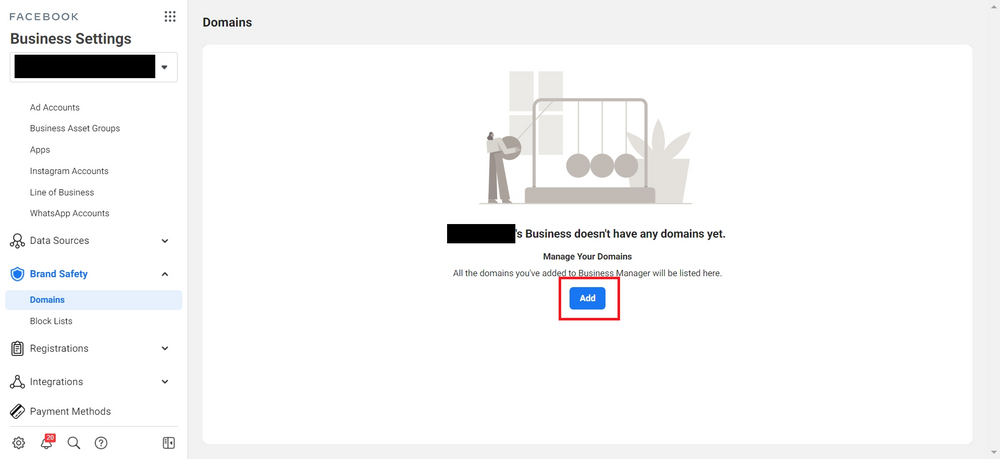
In your Facebook Business Manager, go to Business Settings > Brand Safety > Domains. You'll see a button for you to add your domain.
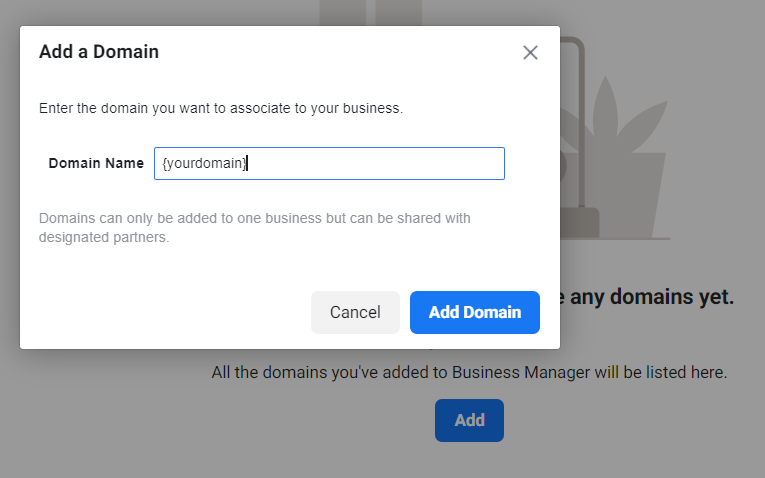
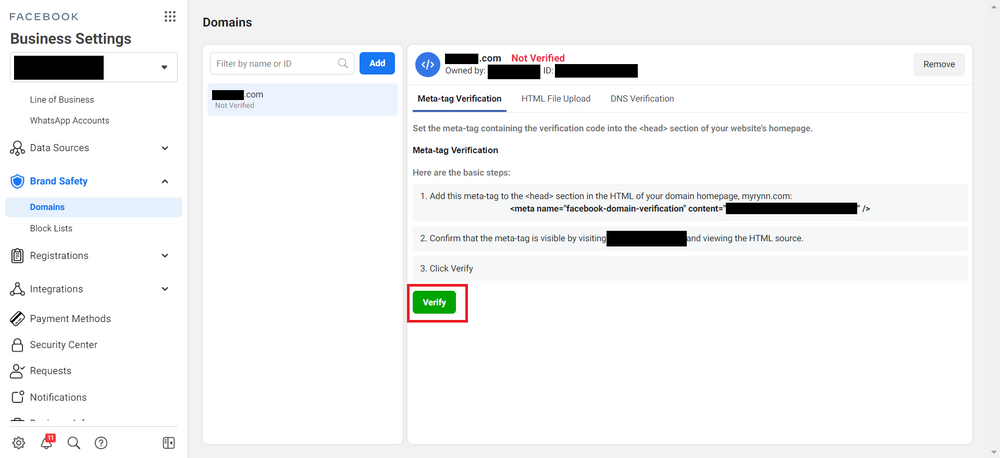
Once you add in your domain, you'll see your domain listed as "Not Verified", and prompt with 3 different methods to verify your domain.
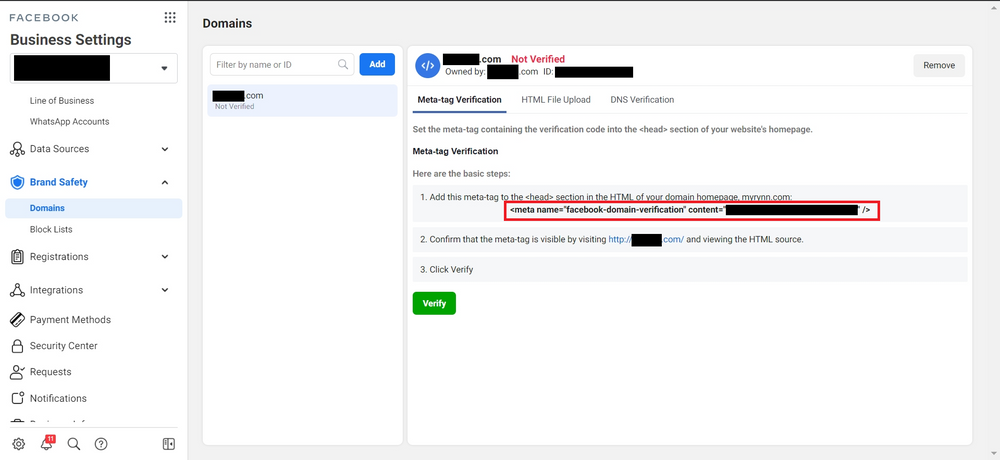
Among the 3 options, I would personally go for the 1st option - Meta-tag Verification as it is the easiest and requires less technical constraint. Simply log in to your CMS, and add this line into the <Head> section of your home page.
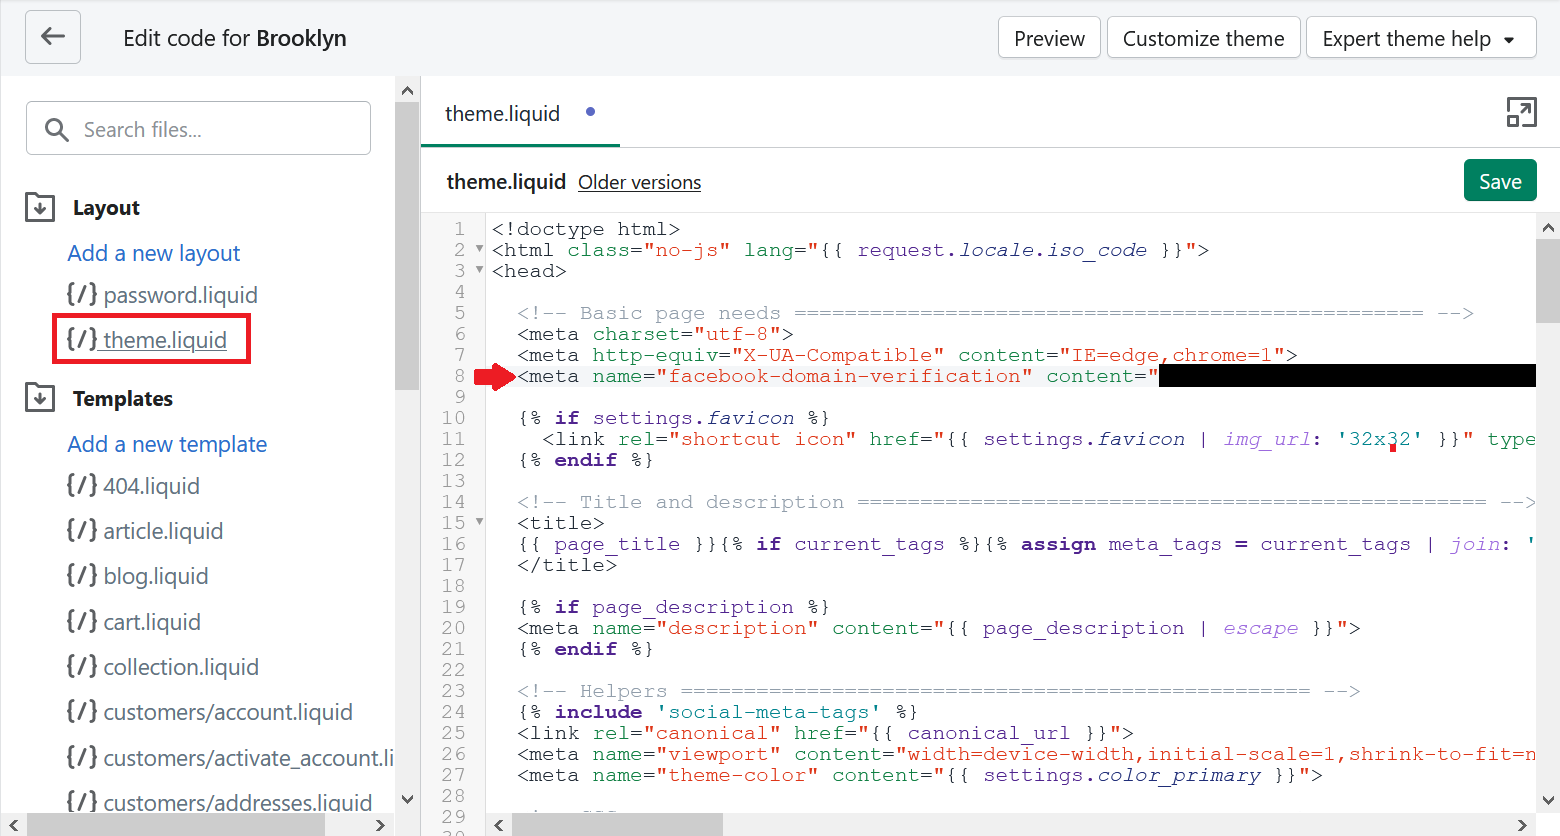
If you're using Shopify, you should go to your Shopify Admin Panel > Online Store > Themes. Click on "Actions", and choose "Edit code".
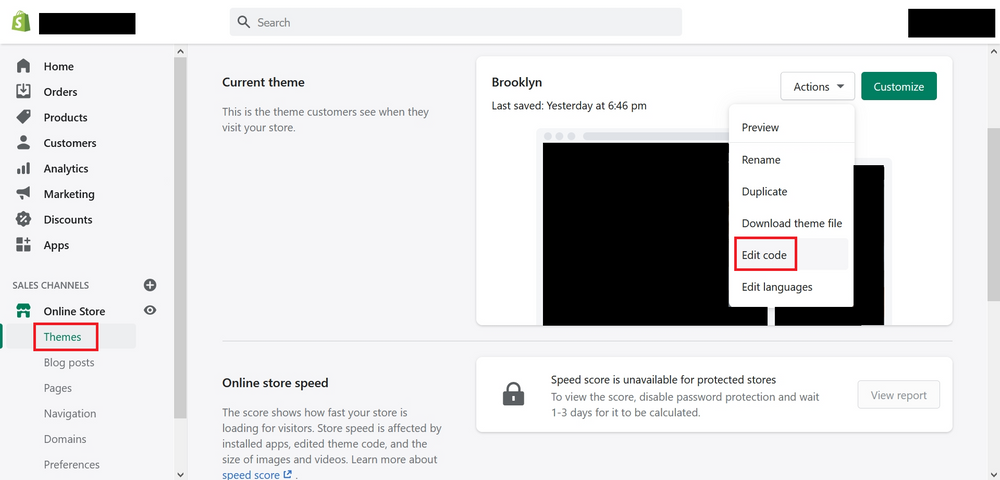
Under theme.liquid, copy & paste your Facebook Domain Verification meta-tag anywhere within the <head> section, then click "Save".
Now go back to your Facebook Business Manager, simply click on the green color "Verify" button.
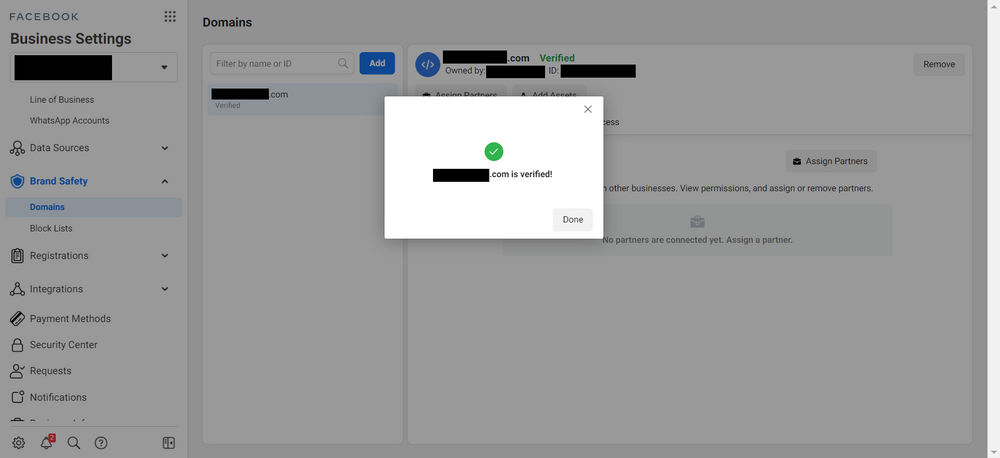
And tadaa, your domain is now verified!
Step 2 - Configure Website Events Using Aggregate Event Measurements
This step is especially important if you are currently running a conversion campaign for business, whether it's e-commerce or lead generation.
-
Facebook Aggregated Event Measurement is a protocol that allows for measurement of web events from iOS 14+ users. Aggregated Event Measurement limits domains to 8 conversion events that can be used for conversion optimization. Those 8 conversion events can come from one Facebook pixel or multiple pixels.
If you have been handling Facebook Ads long enough, you are most likely using multiple pixels or custom conversions to break down website data into more accurate segments for further optimization. So here's why it may sound like DoomsDay:
-
1 Pixel Event / Custom Conversion = 1 Slot in Aggregate Event Measurement
You are only limited to 8 slots per domain, meaning that you have to give up and narrow down to only 8 events to track (including your advertising partner's a.k.a. another Business Manager).
To begin, select "Events Manager" under the Manage Business section:
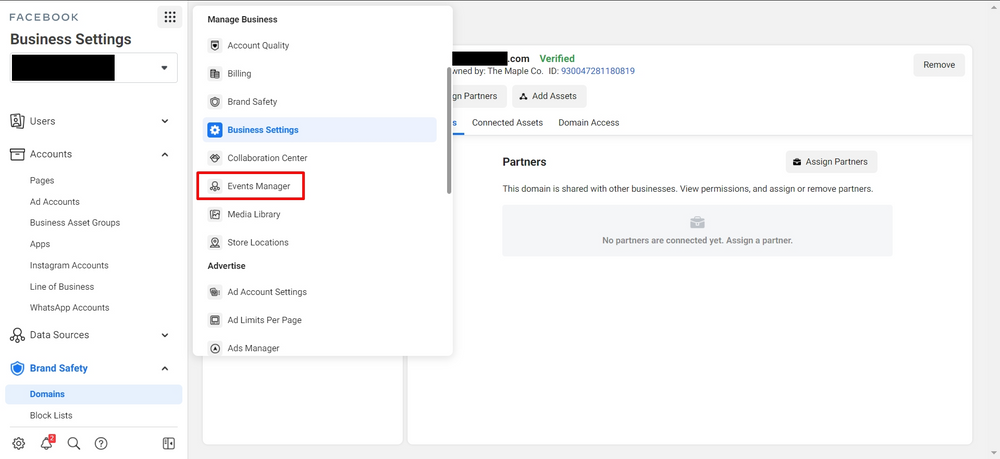
Pick the Facebook pixel that you use for your domain. On the "Aggregated Event Measurement" tab, click on the "Configure Web Events" button.
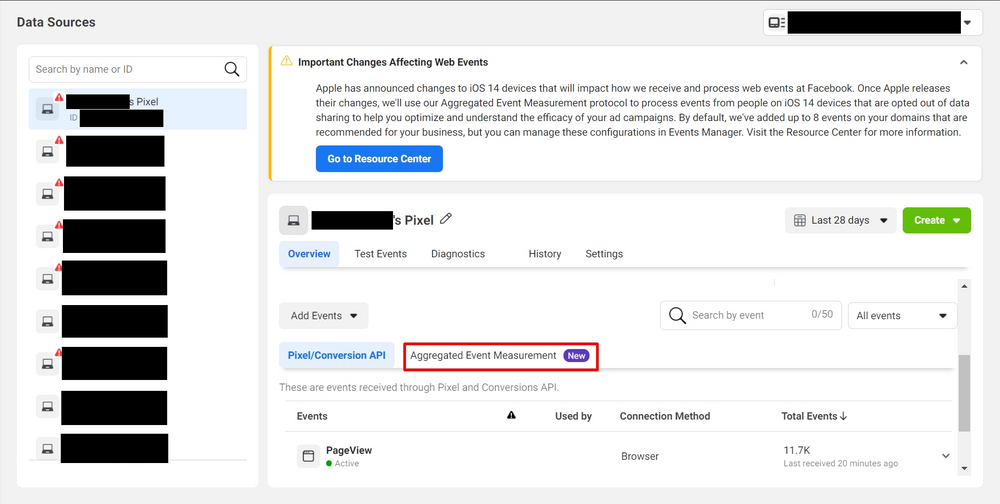
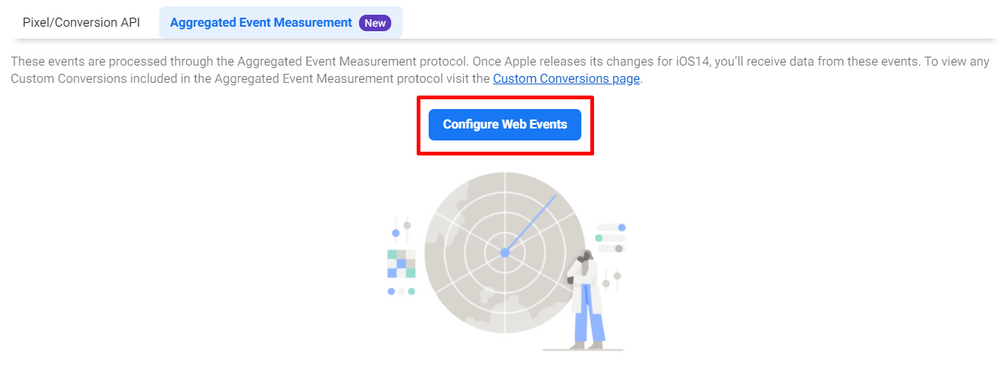
You'll see the domain which you have just verified earlier. Now click on "Manage Events".
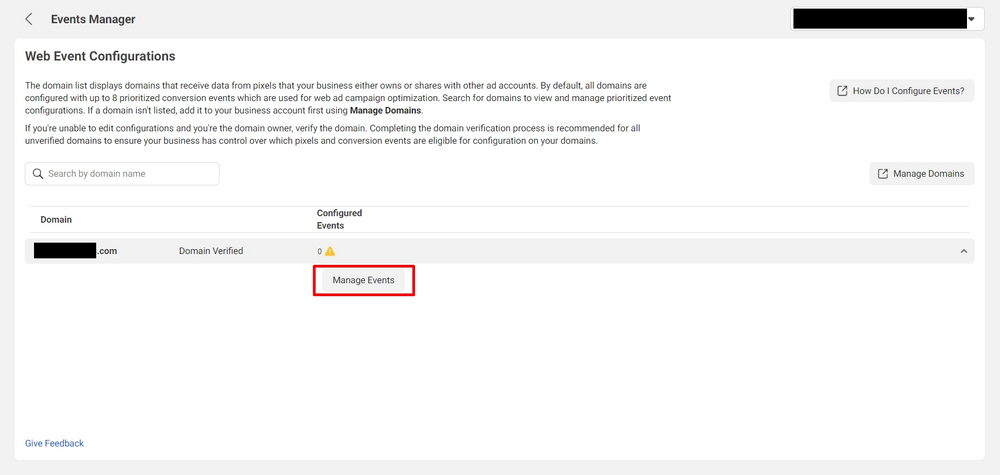
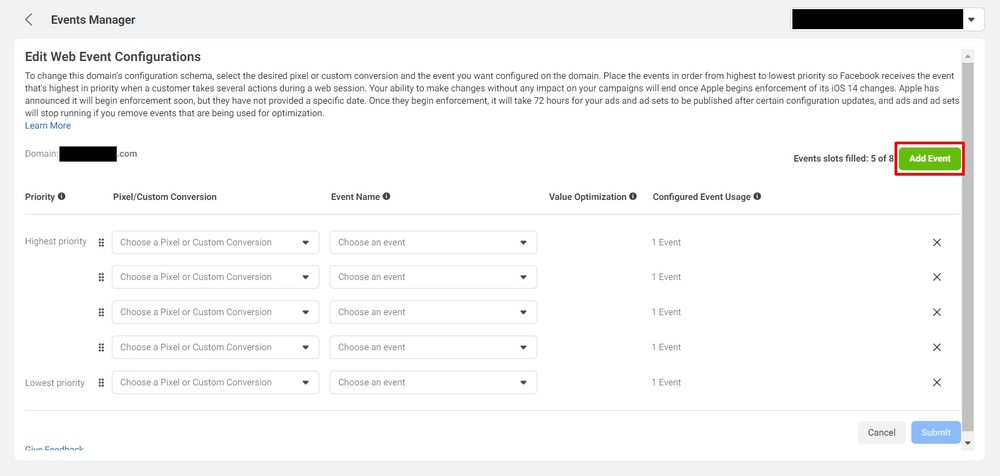
Now you can pick up to the 8 website events that are deemed most important to your business.
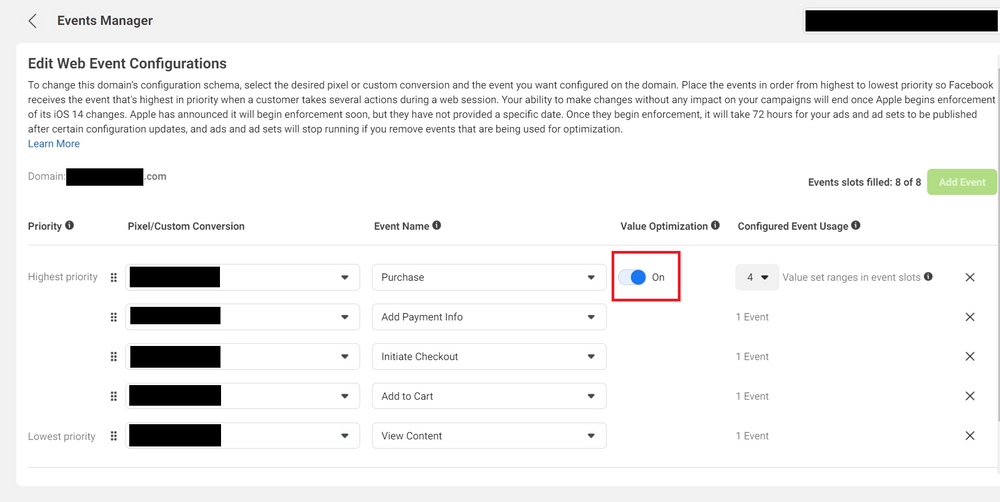
For a typical e-commerce website, I recommend these 5 website events ranked by priority. Note that I turned on Value Optimization for "Purchase" event, and it actually took up 4 event slots. Enabling this will allow you to optimize for "Value" in your conversion campaign.
This "Value" thing sounds familiar? Here's a quick recap.
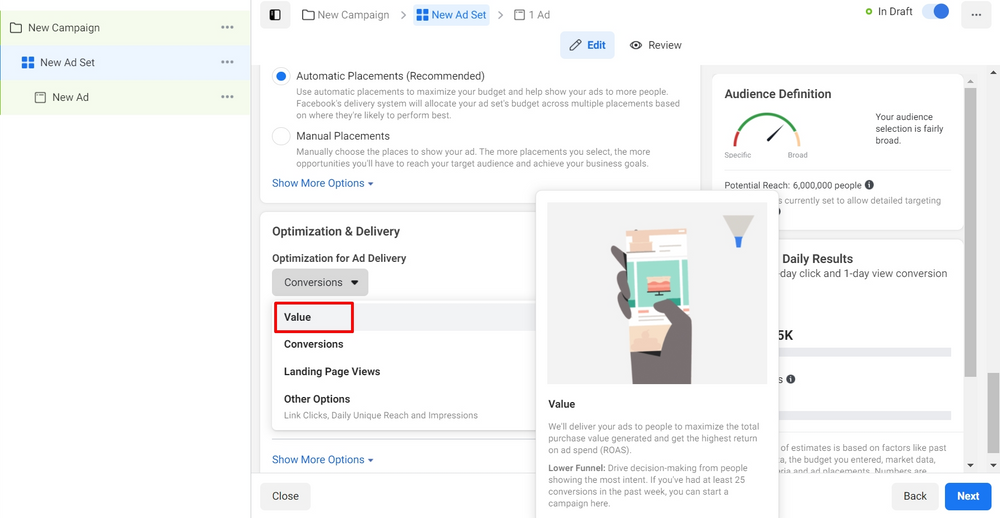
As for the lead generation site, you have more flexibility in terms of tracking depending on how you set up your funnel. Rule of thumb - the final step of your funnel should always remain the highest priority. If you have further steps down the funnel, feel free to make adjustments according to your business requirements.
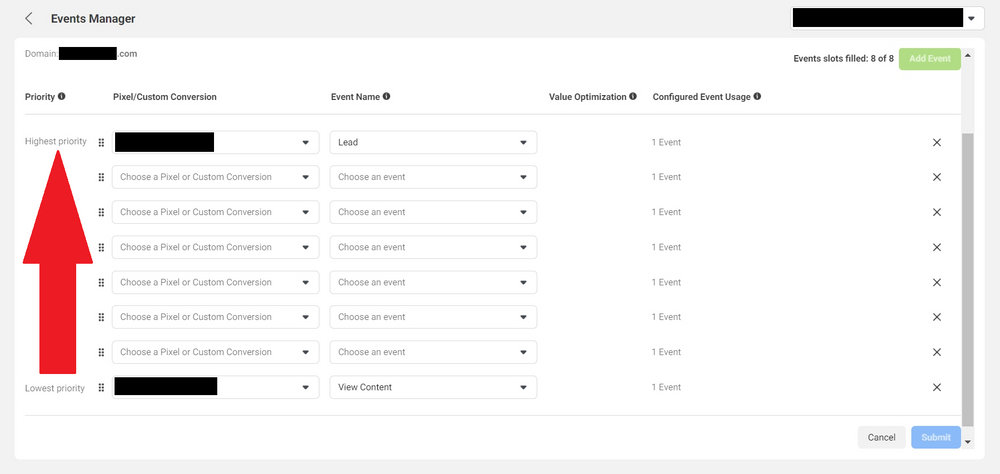
Once you have identified and picked the events, press the "Submit" button on your bottom right, and apply the changes as shown below.
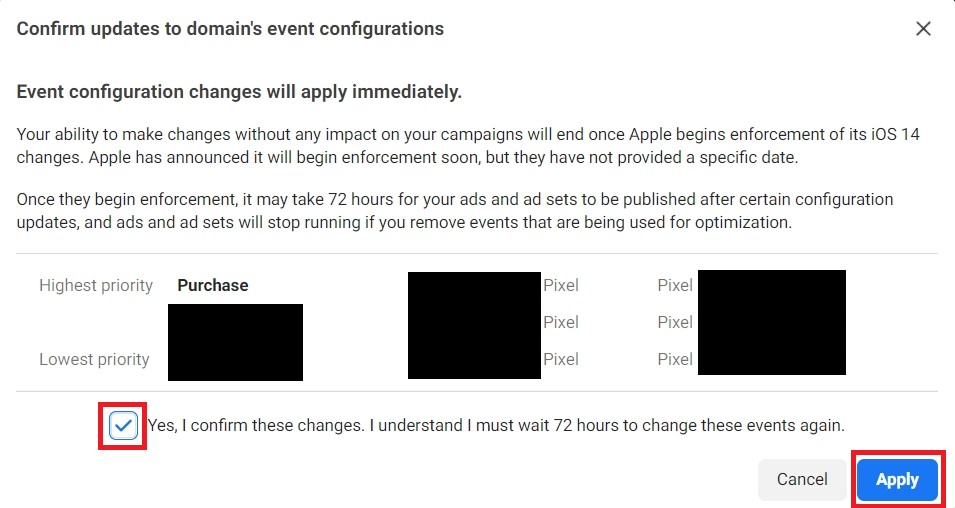
Congratulations! You have finally completed verifying your domain &configuring your account.
